How to Install a Ceiling Fan
Top blog articles
While traditionally frowned upon by interior designers as being eyesores, ceiling fans are becoming more and more popular among homeowners. They’re a great way to keep your home cool during the warm summer months and in the winter they can help keep heated air circulated so the temperature in the room stays warm.
Whether you’re adding a new ceiling fan to your home or replacing an old one, there’s no doubt that it is the perfect solution to making your home feel more comfortable all year long while lowering your monthly energy usage in the process. Plus, with ceiling fans being more stylish than ever, a new ceiling fan will be the perfect addition to complement your home’s decor. However, installing a ceiling fan can be challenging, especially if you’ve never worked on this type of project before. Here, we’ll discuss what skills will be required for this DIY project, the tools you’ll need and the steps for installing a ceiling fan in your home.
Choosing a Ceiling Fan
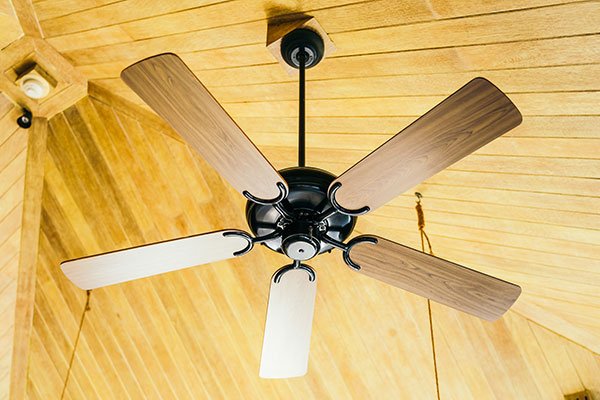
First things first—you’ll need to choose a ceiling fan. There are so many different options available on the market today, from ceiling fans with lights to fans that feature smart technology. Trying to decide on a ceiling fan that works best for your needs can seem like a surprisingly difficult decision. Consider where you want to install your new ceiling fan first, whether that’s inside or outside your home.
Some ceiling fans are rated for indoor use while others are suitable for indoor and outdoor use. However, fans that are rated for indoor use only should never be installed outside, so it’s important that you know where you want your ceiling fan to go ahead of time. You’ll also need to look at the size of the room where your ceiling fan will be installed, which will help you determine how much airflow you’ll need and how large your fan should be. Then, you’ll need to consider the aesthetic details of your ceiling fan and whether it will work with your home’s decor.
Installing Your Ceiling Fan
1. Decide where you want the fan to go.
Choosing where you want to install your new ceiling fan is just as important as selecting the fan itself. There are a few things to take into consideration when deciding on a location for your ceiling fan. First, it’s important to keep in mind that ceiling fans perform best when they are installed at least eight feet above the floor. The blades are required to be at least seven feet away from the floor and at least eight inches away from the ceiling for optimal safety. In addition, the blades must be kept at least 18 inches away from any wall, door or cabinet. Finally, make sure the area around the ceiling where you want to install the ceiling fan isn’t damaged or cracked. You should feel comfortable that the ceiling can sustain the weight of the fan without coming apart.
Read more: 12 Ways To Use Ceiling Fans In Modern Design
2. Uninstall the existing ceiling fan or light fixture.
If you’re installing a ceiling fan in a location where there’s already a fan or an existing light fixture, then before you do anything else, make sure you cut power to the circuit breaker and wall switch to avoid accidental electrocution. When removing the ceiling fan, remove the light kit first (if it came with one). Then the blades, canopy, motor assembly and finally the mounting bracket. If you’re just removing a light fixture, first remove the glass fitters, followed by the bulbs, canopy and mounting bracket.
Read more: Time to replace your ceiling fan
3. Replace the existing electrical box and install a new one.
The next step will be to remove the existing electrical box and replace it with a new one. After removing any screws and washers, pull the electrical box out, being extra careful to avoid damaging the ceiling. Next, insert the support brace and install the new electrical box. You can do this by first removing a knockout on the outlet box and securing a clamp to it. Then, pull the supply line through the clamp and guide it through the opening in the ceiling. Make sure it aligns with the support brace and attach it using screws and washers.
Read more: How to Install Ceiling Fan Wiring
4. Install the downrod.
Once the electrical box has been installed, you’ll need to attach the mounting bracket and downrod. Connect the mounting bracket to the box using screws and washers. Then, pull the electrical wires through the mounting bracket. You’ll need to loosen and trim down the wires so that they’re six inches longer than the downrod. Using wire strippers, remove at least a half inch of insulation from the end of the wires. Feed the wires through the downrod and make sure to tighten it onto the motor coupling. Then, pull the wires and downrod through the canopy.
5. Connect the wiring.
Before connecting the wiring, make sure that the motor assembly and downrod ball are attached and locked tightly in place. Place the bare metal leads together with a wire connector over them and then twist the wires clockwise until the connection is secure.
6. Assemble the fan.
The next step is to assemble the rest of the fan. This includes attaching the fan blades and switch housing, as well as connecting the light kit (this could vary depending on the type of ceiling fan you have). Next, attach the pull chain and connect it to the chain that’s attached to the switch housing. Finally, turn the power back on and sync the ceiling fan to the wall switch.
Read more: Why is my ceiling fan making noise
7. Test it.
Finally, test your new ceiling fan to make sure it turns on and off, operates correctly on each speed setting and that the lights function properly.
Read more: Cleaning the ceiling fan
Written by Greg Tillotson. June 2, 2019
With over 28 years in the ceiling fan, lighting, and fireplace business, Greg possesses a unique blend of hands-on experience, product knowledge, and creativity unlike any Webmaster in this industry. Greg is also a musician who taught himself to play the piano and composes.
Top blog posts


See more >
Recommended
Join our newsletter
Get helpful renovation tips, insightful home maintenance articles, real estate market trends, and more.
Please enter a name
Please enter a valid e-mail
Your opinion matters, leave a comment